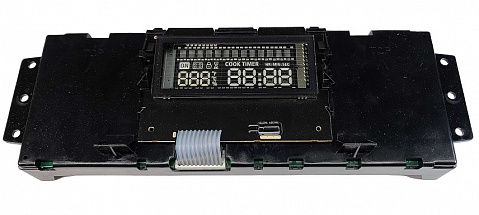
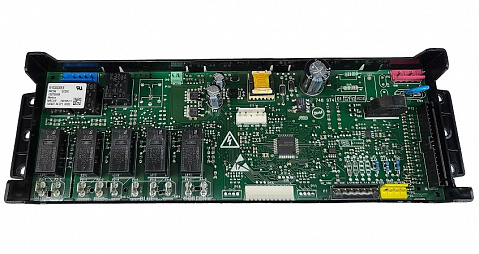
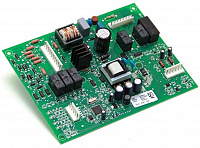
WPW10340304 Oven Control Board Repair
- Estimated Repair Time is 3-5 business days.
- 2 Year Warranty
- Real-Time Repair Tracking
- Our service is 100% guaranteed or your money back. Order today and save!
- International Shipping Available
- Free shipping available at online checkout!
This is a repair service for WPW10340304 Oven Control Board Repair.
For the following brands: Whirlpool
This repair is also for the following similar range/stove/oven control board part numbers:
PS11753211, W10340304, WPW10340304, WPW10340311.
Why Repairing with UpFix is the Better Choice
- Cost-Effective: Avoid the high cost of full appliance replacement. Repairing your control board with us can save you substantial amounts of money, preserving your appliances functionality without breaking the bank.
- Time-Efficient: Choosing to repair rather than replace can drastically reduce the downtime of your appliance. UpFix aims to restore your kitchen’s functionality quickly, eliminating the hassle of searching and waiting for new parts.
- Eco-Friendly: Repairing your appliance with UpFix is a step towards sustainability. By refurbishing your existing control board, you help reduce electronic waste and conserve natural resources, supporting environmental conservation efforts.
Our Expert Repair Process
When you send your defective control board to UpFix, it receives more than just a repair. Our technicians conduct a comprehensive diagnostic to identify and rectify faults. We replace not only the failing components but also upgrade other elements known to degrade over time, ensuring your control board returns to you in top condition.
How It Works
Once we receive your part, our trained and IPC certified technicians will run tests to identify the source of the problem. We will rebuild your part, replacing not only the failed components, but all components that are usually known to fail or go bad in this part. We want to make your experience as effortless as possible. All you have to do is send your part to us. Then after receiving the part back from us, just reinstall it and you’re back in business!
Wide Coverage
Our services are designed to accommodate a multitude of part numbers and models, enhancing the accessibility of our expert repairs across different brands.
What to Expect from UpFix
- Mail your faulty part to us.
- Our experts will rebuild and rigorously test your control board.
- Receive your like-new control board, reinstall it, and enjoy your fully functional appliance once again.
Added Benefits of Choosing UpFix
Estimated Repair Time is 3-5 business days.
- International shipping options to the USA and Canada.
- Comprehensive testing post-repair to guarantee performance.
- A 24-month warranty and lifetime phone support, underlining our commitment to quality and customer satisfaction.
- We uphold the highest standards of integrity and community support in all our business practices.
Removal Instructions
WPW10340304 Oven Control Board Repair
- Turn off breaker.
- Unplug your unit from the outlet.
- Take pictures of each step of the removal process to ensure all wires are correctly reinstalled. Failure to do so may cause severe damage or fires. Failure to reinstall correctly will void all warranties.
- Remove the part that needs to be repaired.
- Start your order today!
- We will provide you with a shipping label at checkout.
We take pride in our work and will take it a step further and fully inspect your control board and will replace failure prone components or parts that may be failing in the future. Each control board is fully tested to make sure it passes a full functional test.
Our service is 100 percent guaranteed or your money back. We stand by our services – If the part is going to fail, itll fail within the first 24 months. Thats why we got you covered with a 24-month warranty and lifetime phone support when you need us
Our goal is to save you hundreds of dollars, while continuing to provide an eco-friendly solution that reduces pollution. We drive our business towards consistent and profitable growth, with integrity and a commitment to the people and communities where we live and work. Our service is 100% guaranteed or your money back.
This repair service will fix these issues:
- Failed after power outage
- Fn Error Code
- No bake function
- No broil function
- Oven does not reach temperature
- Oven exceeds the temperature setpoint or will not turn off
- Unit has no power and is unresponsive
- F01
- F02
- F03
- F04
- F05
- F06
- F1
- F1 E0
- F1 E1
- F1 E2
- F1 E5
- F1 E7
- F1 E9
- F1-1
- F12
- F1-2
- F1-3
- F1-4
- F1-7
- F1-9
- F2
- F2 E1
- F21
- F25
- F3
- F3 E0
- F3 E1
- F3 E2
- F3 E3
- F3-1
- F3-2
- F36 OR F37
- F4 E4
- F42
- F43
- F5
- F5 E0
- F5 E1
- F5 E3
- F5 E4
- F58
- F6
- F6 E1
- F6 E0
- F6 E2
- F6 E3
- No display but unit does power
Don't send your part for repair if
Do NOT send in for repair if the fault you have is indicating a bad touch pad (keypad).
If your fault indicates a thermal issue or heating element issue, then do NOT send in for repair until they are checked/replaced. The typical thermal probe should measure near 1100 at room temperature (+/- 200ohms). The typical heating element measures 20 to 40 ohms. Check your manual for a more accurate information.
See Why Our Customers Love UpFix!
Removal Instructions
1) Turn off breaker.
2) Unplug your unit from outlet.
3) Take pictures each step of the removal process to ensure all wires are correctly reinstalled. Failure to do so may cause severe damage or fires. Failure to reinstall corectly will void all warranties.
4) Remove the part that needs to be repaired.
5) Use our website to start your order and send your part in for repair.
- Free return trip shipping
- Save hundreds of dollars
- High quality components
- Fast & easy process
- 100% guaranteed or your money back
- Amazing customer service and support
- IPC certified technicians (highest standard of quality craftsmanship)
- Guaranteed OEM products
- Refurbished and tested to meet manufacturers specifications
- Hassle-free warranty that is much better than the warranties you get for new replacements.
How it works
Our services are fast and easy. Send us your failed part. We do more than just repair the part, we go to the root of the problem and use the best quality parts to ensure the issue does not return.
We take pride in our work and will take it a step further and fully inspect your control board and will replace failure prone components or parts that may be failing in the future. Each control board is fully tested to make sure it passes a full functional test. Our service is 100 percent guaranteed or your money back.
- Locate your product on our website.
- Match your symptoms with our descriptions to diagnose the issue.
- Place a repair order and receive a shipping label.
- Send your item to us.
- We'll repair and promptly ship it back to you!
Warranty
Our service is 100 percent guaranteed or your money back.
For a full 24 months, our no-hassle warranty covers the repair. We will fix the item again if the repair fails within 24 months. If the component is not repairable, we will, at our discretion, either replace the part entirely or refund the cost of the repair.
We stand by our services – If the part is going to fail, itll fail within the first 3 months. Thats why we got you covered with a 24-month warranty and lifetime phone support when you need us
WPW10340304, W10340304, PS11753211, WPW10340311
Code | Description | Recommended Action |
---|---|---|
ES or E5 | Energy Save is active (some models) | The product is in Energy Save mode. The Energy Save feature places the control and clock into a sleep mode that reduces power consumption by deactivating the display when the product is not being used. If Energy Save mode is activated, each time the product is idle for 5 minutes with only the time of day shown, the display will show the letters “ES” followed by “On” twice. The display will then be blank until a control key (e.g. Bake or Broil) is pressed or the oven door is opened. The control will then perform any of its operations in response to additional key presses. Typical operation of the Energy Save function To enter the Energy Save mode: The oven and control must be idle with the time of day shown on the display. Press and hold CLOCK for 10 seconds. The control will beep, and the display will show the letters “ES” followed by “On” twice. The display will return to the time of day. To exit Energy Save mode: Press and hold the CLOCK key for 10 seconds. The control will beep, and the display will show the letters “ES” followed by “Off” twice. The display will return to the time of day. Press any key on the control to display the Time of Day. See the “Electronic Oven Controls” section of your Owners Manual for more information. If you would like to download or view product literature for your appliance, please visit our Manuals and Literature page. Reset power to the product If the "ES" display does not clear after trying the above, reset power to the product by doing the following: Power unit down by turning off the circuit breaker(s) for one (1) minute. Power unit up by turning on the circuit breaker(s). Monitor the oven for one (1) minute to ensure the error code does not display again. Verify oven operation. |
F0 | Control Board Failure | Send control board to UpFix for repair. |
F1 | Control Board Failure | Send control board to UpFix for repair. |
F1-E0 | EEPROM Communication Error | Disconnect power for at least 30 seconds and then reconnect. Allow at least a minute after power has been restored and if error code reappears. If issue persist, then replace main control board |
F1-E1 | EEPROM Checksum Error | Disconnect power for at least 30 seconds and then reconnect. Allow at least a minute after power has been restored and if error code reappears. If issue persist, then replace main control board. |
F1-E2 | UL A/D Error(s) | Disconnect power for at least 30 seconds and then reconnect. Allow at least a minute after power has been restored and if error code reappears, Send control board to UpFix for repair. |
F1-E3 | Wiring Harness Cavity Size Does Not Match Stored Value | Check the jumpers in the harness to make sure they agree with the actual oven size. |
F1-E4 | Model ID Error | Disconnect power for at least 30 seconds and then reconnect. Allow at least a minute after power has been restored and if error code reappears, Send control board to UpFix for repair. |
F1-E5 | Calibration Shifted | Disconnect power for at least 30 seconds and then reconnect. Allow at least a minute after power has been restored and if error code reappears, Send control board to UpFix for repair. |
F1-E6 | Latch Signal Mismatch Error | Disconnect power for at least 30 seconds and then reconnect. Allow at least a minute after power has been restored and if error code reappears, Send control board to UpFix for repair. |
F1-E9 | Stack Overflow | Disconnect power for at least 30 seconds and then reconnect. Allow at least a minute after power has been restored and if error code reappears, Send control board to UpFix for repair. |
F2 | Oven Temperature Is Too High | Check for welded contacts on bake and broil relays. If present, Send control board to UpFix for repair.. For SELF CLEAN models, check door lock operation. Check sensor, sensor harness, and the sensor harness connection at sensor and oven control. Also check for any causes of high resistance in the oven temperature sensor circuit. Remember: The oven control board (clock) measures resistance of sensor circuit, not actual oven temperature. |
F2-E0 | Shorted Touch Pad (Keypad) | Check the connection between the touch pad (keypad) and control board (clock) to make sure it is secure. Select the cancel function and wait 60 seconds. If error code reappears then replace the touch pad, or touch pad and/or control board (clock) if all one assembly. |
F2-E1 | Touch Pad (Keypad) Cable Unplugged | Check the connection between the touch pad (keypad) and control board (clock) to make sure it is secure. Select the cancel function and wait 60 seconds. If error code reappears then replace the touch pad, or touch pad and control board (clock) if all one assembly. |
F2-E5 | Cancel Key Line Open | Check the connection between the touch pad (keypad) and control board (clock) to make sure it is secure. Select the cancel function and wait 60 seconds. If error code reappears then replace the touch pad, or touch pad and/or control board (clock) if all one assembly. |
F2-E6 | Cancel Key Line Open | Check the connection between the touch pad (keypad) and control board (clock) to make sure it is secure. Select the cancel function and wait 60 seconds. If error code reappears then replace the touch pad, or touch pad and/or control board (clock) if all one assembly. |
F3 | Open Oven Temperature Sensor (RTD) | Replace oven temperature sensor (RTD). |
F3-E (All Codes) | Oven Temperature Sensor (RTD) or Warming Drawer Defect | Replace oven temperature sensor (RTD). If issue persist, send to UpFix for repair. |
F4 | Shorted Oven Temperature Sensor (RTD) | Replace oven temperature sensor (RTD) |
F4-E1 | Meat Probe Defect | This error indicates a problem with either the probe, receptacle, or probe circuit. Check the probe for pinched wires and make sure there is no condensation or contamination on receptacle. If ok, replace probe. |
F5 | Control Board Failure | Send control board to UpFix for repair. |
F5-E (All Codes) | Door Switch Defect | This occurs when the door switches do not match. If door is latched, disconnect power from unit and check wires and connections. If damage is found, replace appropriate part. If connections are not damaged, reconnect power and hold down any key until the F5 error clears. Once the F2 code appears, select cancel and observe for one minute for errors. If door is NOT latched, disconnect power from unit and check wires and connections. If damage is found, replace appropriate part. If connections are not damaged, measure door switch (door open = latch open) and latch switch (unlatch = switch open) and replace either if defective. If corrections are made during any step, power should be reconnected and the unit should be tested. Press and hold any key to clear the error code and F2 code should appear. Select cancel and observe for one minute for errors. If error continues, disconnect power and send to UpFix for repair. |
F6-E0 | Return Line Not Connected | This error should appear within 60 seconds after power up to appliance. Send control board to UpFix for repair. |
F7 | Function Key Stuck | Replace touchpad |
F7-E1 | Common Switch Wire Is Defective | This error occurs when common wire to latch switch and door switch is shorted. Check all connections at control board and at the latch switch and door switch. If connections are ok, then check individual switches as outlined for the F5 error code. Note: Double ovens will have two of each switch and one common wire. |
F8 | Control Board Failure | Send control board to UpFix for repair. |
F9 | Oven Door Lock Failure | Check door lock switches and wiring. Check for stuck lock switch. |
This control board may be found in models similar to the following:
WFE710H0AE0, WFE710H0AE1, WFE710H0AH0, WFE710H0AH1, WFE710H0AS0, WFE710H0AS1, WFE714HLAS0, WFE714HLAS1, YWFE710H0AB0, YWFE710H0AS0, YWFE710H0AW0, YWFE710H0BB1, YWFE710H0BE1, YWFE710H0BH1, YWFE710H0BS1, YWFE710H0BW1, YWFE710H0DE0, YWFE710H0DH0, YWFE710H0DS0