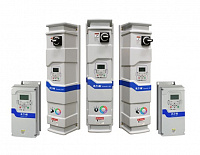
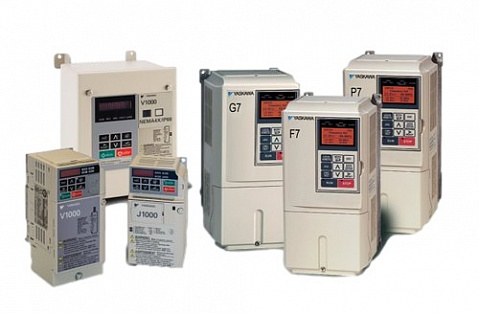
CIMR-G5U25P5 Magnetek AC VFD Variable Frequency Drive Repair
UpFix is NOT an authorized distributor for Magnetek.
Experience the most cost-effective and efficient solution for your industrial VFD issues with UpFix expert repair service. By choosing to repair your original VFD, you not only save significantly compared to the cost of buying a new unit, but you also retain all the custom programming and configurations specific to your operational needs.
- Estimated Repair Time is 3-5 business days.
- 2 Year Warranty
- Real-Time Repair Tracking
- Our service is 100% guaranteed or your money back. Order today and save!
International Shipping Available:
Ships to USA and Canada
Free shipping available at online checkout!
This is a repair service for CIMR-G5U25P5 Magnetek AC VFD Variable Frequency Drive Repair.
UpFix is NOT an authorized distributor for Magnetek.
This repair is also for the following similar VFD model numbers:
CIMRG5U25P5.
Wide Range of Supported VFDs:
Our repair services cover various makes and models, providing a dependable solution for virtually any type of VFD you might be using in your operations.
Why Repairing Your VFD with UpFix is the Better Choice:
- Cost Efficiency: Save up to 80%. Repairing a VFD is significantly more cost-effective than replacing it. Our services can save your business substantial expenditure, preserving capital for other strategic investments.
- Minimized Downtime: A malfunctioning VFD can halt production lines and disrupt operations. Our efficient repair process gets your systems back up and running quickly, reducing downtime and lost productivity.
- Eco-Friendly: Repairing your appliance with UpFix is a step towards sustainability. By refurbishing your existing control board, you help reduce electronic waste and conserve natural resources, supporting environmental conservation efforts.
Our Expert VFD Repair Process:
When you send your VFD to UpFix, it undergoes a thorough diagnostic process to identify both evident and potential issues. We repair and replace defective components, and also proactively upgrade components that are known to fail over time. This comprehensive approach ensures extended reliability and performance of your VFD.
How It Works:
Once we receive your part, our trained and IPC certified technicians will run tests to identify the source of the problem. We will rebuild your part, replacing not only the failed components, but all components that are usually known to fail or go bad in this part. We want to make your experience as effortless as possible. All you have to do is send your part to us. Then after receiving the part back from us, just reinstall it and you’re back in business!
What You Can Expect from UpFix:
- Send your faulty VFD to our repair center.
- Our expert technicians will repair, test, and calibrate your VFD to ensure it meets all operational standards.
- Receive your VFD back and reintegrate it into your system with confidence in its functionality.
- No Reconfiguration Needed
Added Benefits of Choosing UpFix:
Estimated Repair Time is 3-5 business days.
- International shipping options to the USA and Canada.
- Comprehensive testing post-repair to guarantee performance.
- A 24-month warranty and lifetime phone support, underlining our commitment to quality and customer satisfaction.
- We uphold the highest standards of integrity and community support in all our business practices.
Additional Benefits of Choosing UpFix:
Estimated Repair Time is 3-5 business days.
- Fast turnaround times to help keep your operations smooth.
- Service available across the USA and Canada with reliable shipping options.
- Each VFD is thoroughly tested post-repair to ensure it passes all performance and safety tests.
- 24-month warranty and lifetime technical support guarantee your satisfaction and peace of mind.
- We are committed to the highest standards of service and customer satisfaction.
We take pride in our work and will take it a step further and fully inspect your control board and will replace failure prone components or parts that may be failing in the future. Each control board is fully tested to make sure it passes a full functional test.
Our service is 100 percent guaranteed or your money back. We stand by our services – If the part is going to fail, itll fail within the first 24 months. Thats why we got you covered with a 24-month warranty and lifetime phone support when you need us
Our goal is to save you hundreds of dollars, while continuing to provide an eco-friendly solution that reduces pollution. We drive our business towards consistent and profitable growth, with integrity and a commitment to the people and communities where we live and work. Our service is 100% guaranteed or your money back.
This repair service will fix these issues:
- Auto Tune Failure
- Checksum Fault
- Does Not Enable
- Does Not Power
- Fails Under Load
- Fans Not Turning On
- Ground Fault
- Heatsink Fault
- I/O Terminal Not Working
- Input Phase Fault
- Keypad Issue
- Keys Dont Press
- No Output
- Output Phase Fault
- Output Runs Erratically
- Overcurrent Fault
- Overvoltage Fault
- Power Loss
- Undervoltage Fault
- Unit Had Blown Up
- Unit Smoked
Cost-Effective
Repairing your existing VFD can be substantially more affordable than purchasing a new one. Enjoy significant savings while maintaining optimal functionality.
No Reconfiguration Needed
One of the biggest advantages of repairing your original VFD is the elimination of reprogramming. Your VFD will be returned to you with all its original settings intact, ensuring a seamless reintroduction into your system without the need for costly and time-consuming reconfiguration.
Quick Turnaround
We understand the importance of minimizing downtime. Our skilled technicians ensure a quick and efficient repair process, getting your operations back up and running in no time.
Quality Assurance
We use only the highest quality parts and the latest techniques in our repair processes, ensuring your VFD returns to you in top-notch condition, often better than its pre-fault state.
Extended Life for Your Equipment
Repairing and maintaining your existing VFD can significantly extend its life, making it a sustainable choice for your business and the environment.
Expert Support
Our team of experienced technicians is well-versed in a wide range of VFD brands and models, providing you with knowledgeable support and advice every step of the way.
Our Commitment
At UpFix, we are committed to providing you with a reliable, high-quality repair service that keeps your operations smooth and efficient. Trust us to restore your VFD to its optimal performance, ensuring your business runs uninterrupted.
A full diagnostic check should first be performed to eliminate all other possible causes for your symptoms, even if the symptoms match those specified on the common fault description.
If you send a unit in good working condition due to misdiagnosis, and our testing determines that there are no issues or faults with the unit, or if the part is beyond repair, then you will only be responsible for the shipping costs and a bench test fee of $39.99 may be applied.
IMPORTANT! If you are not sure that this part is the cause of the fault then we recommend that you do not go ahead with this purchase and instead seek further professional advice and diagnosis.- Free round trip shipping
- Fast & easy process
- High quality components
- 100% guaranteed or your money back
- Save hundreds of dollars
- Amazing customer service and support
- No programming needed
- Plug-n-play
- Refurbished and tested to meet manufacturers specifications
- IPC certified technicians (highest standard of quality craftsmanship)
- Hassle-free warranty that is much better than the warranties you get for new replacements.
Warranty
Our service is 100 percent guaranteed or your money back.
For a full 24 months, our no-hassle warranty covers the repair. We will fix the item again if the repair fails within 24 months. If the component is not repairable, we will, at our discretion, either replace the part entirely or refund the cost of the repair.
We stand by our services – If the part is going to fail, itll fail within the first 3 months. Thats why we got you covered with a 24-month warranty and lifetime phone support when you need us
How it works
Our services are fast and easy. Reducing downtime is extremely important to us. Our standard repair is usually under 1 week. Meanwhile, offering a high-quality repair service with a focus on quick, long-lasting repairs at competitive prices.
We take pride in our work and not only fully inspecting/repairing your faulty part, but will take it a step further and will replace failure prone components or parts that may be failing in the future. Each control board is fully tested to make sure it passes a full functional test. Our service is 100 percent guaranteed or your money back.
- Carefully remove your part.
- Securely pack your part, using the correct box so that your part cannot be damaged in transit. Take special care when packing.
- Add item to shopping cart and check out. We will provide you with shipping label to send the part to us. You will not need to pay anything until your part is full repaired.
- Inside the package include: Your Name, Return Address, Phone Number.
International Shipping Available
We ship to USA and Canada
CIMRG5U25P5
| Code | Description | Recommended Action |
|---|---|---|
| BUS Option Com Err | Option Card Transmission Error A communications error occurred in a mode where the run command or a frequency reference is set from an Transmission Option Card. | CAUSE: 1) −−− SOLUTION: 1) Check the Transmission Card and signals |
| CALL Serial Com Call | SI-B Communications Error Control data was not normally received when power was turned ON. | CAUSE: 1) −−− SOLUTION: 1) Check the communications devices and signals. |
| CE MEMOBUS Com Err | Communications Error Normal reception was not possible for 2 s after received control data. | CAUSE: 1) −−− SOLUTION: 1) Check the communications devices and signals. |
| CF Out of Control | Control Fault The torque limit was reached continuously for 3 seconds or longer during a deceleration stop during open-loop vector control. | CAUSE: 1) --- SOLUTION: 1) Check the motor constants. |
| CPF00 COM-ERR (OP&INV) | Operator Communications Error 1 Communications with the Operator were not established within 5 seconds after the power was turned on. | CAUSE: 1) The Digital Operator’s connector isn’t connected properly. 2) The Inverter’s control circuits are faulty. SOLUTION: 1) Disconnect the Digital Operator and then connect it again. 2) Replace the Inverter. |
| CPF01 COM-ERR (OP&INV) | Operator Communications Error 2 After communications were established there was a transmission error with the Digital Operator for more than 2 seconds. | CAUSE: 1) The Digital Operator isn’t connected properly. 2) The Inverter’s control circuits are faulty. SOLUTION: 1) Disconnect the Digital Operator and then connect it again. 2) Replace the Inverter. |
| CPF02 BB Circuit Err | Baseblock circuit error | CAUSE: 1) --- 2) The control circuit is damaged. SOLUTION: 1) Try turning the power supply off and on again. 2) Replace the Inverter. |
| CPF03 EEPROM Error | EEPROM error | CAUSE: 1) --- 2) The control circuit is damaged. SOLUTION: 1) Try turning the power supply off and on again. 2) Replace the Inverter. |
| CPF04 Internal A/D Err | CPU internal A/D converter error | CAUSE: 1) --- 2) The control circuit is damaged. SOLUTION: 1) Try turning the power supply off and on again. 2) Replace the Inverter. |
| CPF05 External A/D Err | CPU external A/D converter error | CAUSE: 1) --- 2) The control circuit is damaged. SOLUTION: 1) Try turning the power supply off and on again. 2) Replace the Inverter. |
| CPF06 Option Error | Option Card connection error | CAUSE: 1) The Option Card is not connected properly. 2) The Inverter or Option Card is faulty. SOLUTION: 1) Turn off the power and insert the Card again. 2) Replace the faulty component. |
| CPF20 Option A/D Error | Option Card A/D converter error | CAUSE: 1) The Option Card is not connected properly. 2) The Option Card’s A/D converter is faulty. SOLUTION: 1) Turn off the power and insert the Card again. 2) Replace the Option Card. |
| CPF21 Option CPU down | Transmission Option Card self diagnostic error | CAUSE: 1) Option Card fault. SOLUTION: 1) Replace the Option Card. |
| CPF22 Option Type Err | Transmission Option Card model code error | CAUSE: 1) Option Card fault. SOLUTION: 1) Replace the Option Card. |
| CPF23 Option DPRAM Err | Transmission Option Card DPRAM error | CAUSE: 1) Option Card fault. SOLUTION: 1) Replace the Option Card. |
| DEV Speed Deviation | Excessive Speed Deviation After the actual (motor) speed and the reference speed agree (depending on the setting of F1−04), the speed deviation changes so it is greater than the setting in F1-10 for longer than the setting in F−11. | CAUSE: 1) The load is too heavy. 2) The acceleration time and deceleration time are too short. 3) The load is locked. 4) The settings in F1-10 and F1-11 aren’t appropriate. 5) --- SOLUTION: 1) Reduce the load. 2) Lengthen the acceleration time and deceleration time. 3) Check the mechanical system. 4) Check the settings in F1-10 and F1-11. 5) Check for open circuit when using brake (motor). |
| DEV (blinking) Speed Deviation | Excessive Speed Deviation The speed deviation has been greater than the setting in F1-10 for longer than the setting in F1-11. | CAUSE: 1) The load is too large. 2) The acceleration time and deceleration time are too short. 3) The load is locked. 4) The settings in F1-10 and F1-11 aren’t appropriate. SOLUTION: 1) Reduce the load. 2) Lengthen the acceleration time and deceleration time. 3) Check the mechanical system. 4) Check the settings in F1-10 and F1-11. |
| E-15 Si-F/G Com Err | SI-F/G Communications Error Detected A communications error occurred in a mode where run or a frequency reference is set from an Transmission Option Card and E-15 is set to continue operation. | CAUSE: 1) −−− SOLUTION: 1) Check the communications signals. |
| EF (blinking) External Fault | Forward/Reverse Run Commands Input Together Both the forward and reverse run commands have been ON for more than 0.5 s. | CAUSE: 1) −−− SOLUTION: 1) Check the sequence of the forward and reverse run commands. :Since the rotational direction is unknown, the motor will be decelerated to a stop when this minor fault occurs. |
| EF0 Opt External Flt | External fault input from Transmission Option Card. | CAUSE: 1) --- SOLUTION: 1) Check the Transmission Option Card and transmission signal. |
| EF0 Opt External Flt | SI-K2 External Error Detected An external error ware received from an Option Card when EF0 was set to continue operation. | CAUSE: 1) −−− SOLUTION: 1) Remove the cause of the external error |
| EF3 External Fault 3 | External fault (Input terminal 3) | CAUSE: 1) An “external fault” was input from a multi-function input. SOLUTION: 1) - Reset external fault inputs to the multi-function inputs. - Remove the cause of the external fault. |
| EF3 (blinking) External Fault 3 | External fault (Input terminal 3) | CAUSE: 1) An “external fault” was input from a multi-function input. SOLUTION: 1) - Reset external fault inputs to the multi-function inputs. - Remove the cause of the external fault. |
| EF4 | External fault (Input terminal 4) | CAUSE: 1) An “external fault” was input from a multi-function input. SOLUTION: 1) - Reset external fault inputs to the multi-function inputs. - Remove the cause of the external fault. |
| EF4 (blinking) | External fault (Input terminal 4) | CAUSE: 1) An “external fault” was input from a multi-function input. SOLUTION: 1) - Reset external fault inputs to the multi-function inputs. - Remove the cause of the external fault. |
| EF5 | External fault (Input terminal 5) | CAUSE: 1) An “external fault” was input from a multi-function input. SOLUTION: 1) - Reset external fault inputs to the multi-function inputs. - Remove the cause of the external fault. |
| EF5 (blinking) | External fault (Input terminal 5) | CAUSE: 1) An “external fault” was input from a multi-function input. SOLUTION: 1) - Reset external fault inputs to the multi-function inputs. - Remove the cause of the external fault. |
| EF6 | External fault (Input terminal 6) | CAUSE: 1) An “external fault” was input from a multi-function input. SOLUTION: 1) - Reset external fault inputs to the multi-function inputs. - Remove the cause of the external fault. |
| EF6 (blinking) | External fault (Input terminal 6) | CAUSE: 1) An “external fault” was input from a multi-function input. SOLUTION: 1) - Reset external fault inputs to the multi-function inputs. - Remove the cause of the external fault. |
| EF7 | External fault (Input terminal 7) | CAUSE: 1) An “external fault” was input from a multi-function input. SOLUTION: 1) - Reset external fault inputs to the multi-function inputs. - Remove the cause of the external fault. |
| EF7 (blinking) | External fault (Input terminal 7) | CAUSE: 1) An “external fault” was input from a multi-function input. SOLUTION: 1) - Reset external fault inputs to the multi-function inputs. - Remove the cause of the external fault. |
| EF8 | External fault (Input terminal 8) | CAUSE: 1) An “external fault” was input from a multi-function input. SOLUTION: 1) - Reset external fault inputs to the multi-function inputs. - Remove the cause of the external fault. |
| EF8 (blinking) | External fault (Input terminal 8) | CAUSE: 1) An “external fault” was input from a multi-function input. SOLUTION: 1) - Reset external fault inputs to the multi-function inputs. - Remove the cause of the external fault. |
| ERR EEPROM R/W Err | EEPROM write error | |
| GF Ground Fault | Ground Fault The ground fault current at the Inverter output exceeded approximately 50% of the Inverter rated output current | CAUSE: 1) A ground fault occurred at the Inverter output. (A ground fault can be caused by motor burn damage, worn insulation, or a damaged cable.) SOLUTION: 1) Reset the fault after correcting its cause. |
| LF Output Pha Loss | Output Open-phase An open-phase occurred at the Inverter output. This fault is detected when L8-07 is set to “Enabled.” | CAUSE: 1) - There is a broken wire in the output cable. - There is a broken wire in the motor winding. - The output terminals are loose. 2) The motor being used has a capacity less than 5% of the Inverter’s maximum motor capacity. SOLUTION: 1) Reset the fault after correcting its cause. 2) Check the motor and Inverter capacity. |
| OC Overcurrent | Overcurrent The Inverter output current exceeded the overcurrent detection level. (200% of rated current) | CAUSE: 1) - A short-circuit or ground fault occurred at the Inverter output. (Ashort or ground fault can be caused by motor burn damage, worn insulation, or a damaged cable.) - The load is too large or the acceleration/deceleration time is too short. - A special-purpose motor or motor with a capacity too large for the Inverter is being used. - A magnetic switch was switched at the Inverter output. SOLUTION: 1) Reset the fault after correcting its cause. |
| OH (blinking) Heatsink Over tmp | Cooling Fin Overheating The temperature of the Inverter’s cooling fins exceeded the setting in L8-02. | CAUSE: 1) The ambient temperature is too high. 2) There is a heat source nearby. 3) The Inverter cooling fan has stopped. SOLUTION: 1) Install a cooling unit. 2) Remove the heat source. 3) Replace the cooling fan. (Contact your Yaskawa representative.) |
| OH (OH1) Heatsink Over tmp | Cooling Fin Overheating The temperature of the Inverter’s cooling fins exceeded the setting in L8-02 or 105°C. OH: The temperature exceeded the setting in L8-02 (Stopping method can be changed by L8-03.). OH1: The temperature exceeded 105°C (Stopping method: Coast to stop). | CAUSE: 1) The ambient temperature is too high. 2) There is a heat source nearby. 3) The Inverter’s cooling fan has stopped. SOLUTION: 1) Install a cooling unit. 2) Remove the heat source. 3) Replace the cooling fan. (Contact our sales representative.) |
| OH (OH1) Heatsink Over tmp | Inverter’s Cooling Fan Stopped (18.5 kW or larger) | CAUSE: 1) The Inverter’s cooling fan has stopped. (18.5 kW or larger) SOLUTION: 1) Replace the cooling fan. (Contact our sales representative.) |
| OH2 (blinking) Over Heat 2 | Inverter Overheating Pre-alarm An OH2 alarm signal (Inverter overheating alarm signal) was input from a multi-function input. | CAUSE: 1) −−− SOLUTION: 1) Clear the multi-function input’s overheating alarm input. |
| OL1 Motor Overloaded | Motor Overload The motor overload protection function has operated based on the internal electronic thermal value. | CAUSE: 1) The load is too heavy. The acceleration time, deceleration time, and cycle time are too short. 2) The V/f characteristics voltage is too high. 3) The motor’s rated current setting (E2-01) is incorrect. SOLUTION: 1) Check the size of the load and the length of the acceleration, deceleration, and cycle times. 2) Check the V/f characteristics. 3) Check the motor’s rated current setting (E2-01). |
| OL2 Inv Overloaded | Inverter Overload The Inverter overload protection function has operated based on the internal electronic thermal value. | CAUSE: 1) The load is too heavy. The acceleration time, deceleration time and cycle time are too short. 2) The V/f characteristics voltage is too high. 3) The Inverter capacity is too low SOLUTION: 1) Check the size of the load and the length of the acceleration, deceleration, and cycle times. 2) Check the V/f characteristics. 3) Replace the Inverter with one that has a larger capacity. |
| OL3 Overtorque Det 1 | Overtorque 1 There has been a current greater than the setting in L6-02 for longer than the setting in L6-03. | CAUSE: 1) --- SOLUTION: 1) - Make sure that the settings in L6-02 and L6-03 are appropriate. - Check the mechanical system and correct the cause of the overtorque. |
| OL3 (blinking) Overtorque Det 1 | Overtorque 1 There has been a current greater than the setting in L6-02 for longer than the setting in L6-03. | CAUSE: 1) −−− SOLUTION: 1) - Make sure that the settings in L6-02 and L6-03 are appropriate. - Check the mechanical system and correct the cause of the overtorque. |
| OL4 Overtorque det 2 | Overtorque 2 There has been a current greater than the setting in L6-05 for longer than the setting in L6-06. | CAUSE: 1) --- SOLUTION: 1) - Make sure that the current setting in L6-05 and time setting in L6-06 are appropriate. - Check the mechanical system and correct the cause of the overtorque. |
| OL4 (blinking) Overtorque Det 2 | Overtorque 2 There has been a current greater than the setting in L6-05 for longer than the setting in L6-06. | CAUSE: 1) −−− SOLUTION: 1) - Make sure that the current setting in L6-05 and time setting in L6-06 are appropriate. - Check the mechanical system and correct the cause of the overtorque. |
| OPE01 kVA Selection | Incorrect Inverter capacity setting | |
| OPE02 Limit | Constant setting range error | |
| OPE03 Terminal | Multi-function input selection error | |
| OPE05 Sequence Select | Option Card selection error | |
| OPE06 PG Opt Missing | Control method selection error | |
| OPE07 Analog Selection | Multi-function analog input selection error | |
| OPE08 Elevator Table | Constant selection error | |
| OPE10 V/f Ptrn Setting | V/f data setting error | |
| OPE11 CarrFrg/On-Delay | Constant setting error | |
| OPR Oper Disconnect | Operator Connection Fault The Operator was disconnected during operation started by a run command from the Operator. | CAUSE: 1) --- SOLUTION: 1) Check the Operator connection. |
| OS Over speed | Overspeed The speed has been greater than the setting in F1-08 for longer than the setting in F1-09. | CAUSE: 1) Overshooting/Undershooting are occurring. 2) The reference speed is too high. 3) The settings in F1-08 and F1-09 aren’t appropriate. SOLUTION: 1) Adjust the gain again. 2) Check the reference circuit and reference gain. 3) Check the settings in F1-08 and F1-09. |
| OS (blinking) Over speed | Overspeed The speed has been greater than the setting in F1-08 for longer than the setting in F1-09. | CAUSE: 1) Overshooting/undershooting are occurring. 2) The reference speed is too high. 3) The settings in F1-08 and F1-09 aren’t appropriate. SOLUTION: 1) Adjust the gain again. 2) Check the reference circuit and reference gain. 3) Check the settings in F1-08 and F1-09. |
| OV Overvoltage | Main Circuit Overvoltage The main circuit DC voltage exceeded the overvoltage detection level. 200 V class: Approx. 406 V 400 V class: Approx. 812 V | CAUSE: 1) The deceleration time is too short and the regenerative energy from the motor is too large. 2) The power supply voltage is too high. SOLUTION: 1) Increase the deceleration time or connect a braking resistor (or Braking Resistor Unit). 2) Decrease the voltage so it’s within specifications. |
| OV (blinking) Overvoltage | Main Circuit Overvoltage The main circuit DC voltage exceeded the overvoltage detection level. 200 V class: Approx. 406 V 400 V class: Approx. 812 V | CAUSE: 1) The power supply voltage is too high. SOLUTION: 1) Decrease the voltage so it’s within specifications. |
| PF Input Pha Loss | Main Circuit Voltage Fault The main circuit DC voltage oscillates unusually (not when regenerating). This fault is detected when L8-05 is set to “Enabled.” | CAUSE: 1) - An open-phase occurred in the input power supply. - A momentary power loss occurred. - The wiring terminals for the input power supply are loose. - The voltage fluctuations in the input power supply are too large. - The voltage balance between phases is bad. SOLUTION: 1) Reset the fault after correcting its cause. |
| PGO PG open | PG Disconnection Detected PG pulses aren't being input due to the following conditions: The status has exceeded F1-14 time. Flux vector: Soft start output ≥ 2% Flux V/f: Soft start output ≥ E1-09 | CAUSE: 1) There is a break in the PG wiring. 2) The PG is wired incorrectly. 3) Power isn’t being supplied to the PG. 4) --- SOLUTION: 1) Fix the broken/disconnected wiring. 2) Fix the wiring. 3) Supply power to the PG properly. 4) Check for open circuit when using brake (motor). |
| PGO (blinking) PG open | The PG is disconnected. The Inverter is outputting a frequency, but PG pulses aren’t being inpu | CAUSE: 1) There is a break in the PG wiring. 2) The PG is wired incorrectly. 3) Power isn’t being supplied to the PG. SOLUTION: 1) Fix the broken/disconnected wiring. 2) Fix the wiring. 3) Supply power to the PG properly. |
| PUF DC Bus Fuse Open | Fuse Blown The fuse in the main circuit is blown. | CAUSE: The output transistor has failed because of a short-circuit or ground fault at the Inverter output. Check whether there is a short-circuit between the following terminals. A short-circuit will damage the output transistor: B1 (¨3) ↔ U, V, W © ↔ U, V, W SOLUTION: 1) Replace the Inverter after correcting the cause. |
| RH Dyn Brk Resistor | Installed Braking Resistor Overheating The braking resistor is overheated and the protection function set with L8-01 has operated. | CAUSE: 1) The deceleration time is too short and the regenerative energy from the motor is too large. SOLUTION: 1) - Reduce the load, increase the deceleration time, or reduce the motor speed. - Change to a Braking Resistor Unit. |
| RR Dyn Brk Transistr | Internal Braking Transistor Fault The braking transistor is not operating properly | CAUSE: 1) --- SOLUTION: 1) - Try turning the power supply off and on. - Replace the Inverter if the fault continues to occur. |
| SC Short Circuit | Load Short-circuit The Inverter output or load was short circuited. | CAUSE: A short-circuit or ground fault occurred at the Inverter output. (A short or ground fault can be caused by motor burn damage, worn insulation, or a damaged cable.) SOLUTION: 1) Reset the fault after correcting its cause. |
| SVE Zero Servo Fault | Zero Servo Fault The rotation position moved during zero servo operation. | CAUSE: 1) The torque limit is too small. 2) The load torque is too large. 3) --- SOLUTION: 1) Increase the limit. 2) Reduce the load torque. 3) Check for signal noise. |
| UV (blinking) DC Bus Undervolt | Main Circuit Undervoltage The following conditions occurred when there was no Run signal. - The main circuit DC voltage was below the undervoltage detection level (L2-05). - The surge current limiting contactor opened. - The control power supply voltage when below the CUV level. | CAUSE: 1) See causes for UV1, UV2, and UV3 faults. SOLUTION: 1) See corrective actions for UV1, UV2, and UV3 faults. |
| UV1 DC Bus Undervolt | Main Circuit Undervoltage The main circuit DC voltage is below the undervoltage detection level (L2-05). 200 V class: Approx. 190 V 400 V class: Approx. 380 V | CAUSE: 1) - An open-phase occurred with the input power supply. - A momentary power loss occurred. - The wiring terminals for the input power supply are loose. - The voltage fluctuations in the input power supply are too large. SOLUTION: 1) Reset the fault after correcting its cause. |
| UV2 CTL PS Undervolt | Control Power Fault The control power supply voltage dropped. | CAUSE: 1) --- SOLUTION: 1) - Try turning the power supply off and on. - Replace the Inverter if the fault continues to occur. |
| UV3 MC Answerback | Inrush Prevention Circuit Fault A fault occurred in the inrush prevention circuit. | CAUSE: 1) --- SOLUTION: 1) - Try turning the power supply off and on. - Replace the Inverter if the fault continues to occur. |
This control board may be found in models similar to the following:
CIMR-G5U25P5